HTML Editor Help Guide
The HTML editor acts just like any other editor such as Microsoft Word. Users who have not updated their websites CMS to the latest might have a different version of the editor than what is used for this tutorial.
Edit Text
- To edit text type some in the editor and highlight it with your mouse and click the Paragraph Format button (3rd row of icons, default setting is Normal)
- From here you can select Normal, Heading 1, Heading 2, etc. to change your highlighted text to (use keywords in your headings for search engine optimisation)
- We do not recommend using the Font, Size or Text Colour options located on the 3rd row to change your text as it can make your website pages look muddled, please use the Styles and Paragraph Format option if you wish to format your text

- You can also style your text bold, italic, underlined, etc. by selecting the associated button located on the 2nd row
- To erase formatted text highlight the text and click the Remove Format button (blue rubber icon located on the 2nd row)

- When copying content from Microsoft Word or similar please either use the Paste as plain text or Paste from Word buttons located on the 1st row of buttons (icon with the folder and blue notepad in front of it or icon with folder and Microsoft Word icon in front of it)

- Click either one of the icons and paste the text inside the pop-up box, following instructions, and click OK
Images
- Click the cursor where you want your image placed
- Select the Image icon (square picture with house) on the 2nd row

- If you have not already uploaded the image to the server go to Upload from the tab menu
- Click Browse or Choose File and select the image from your documents and click Open
- Click Send it to the Server
- If the image is already on the server, stay on the Image Info tab and select Browse Server
- This will open up the CKFinder
- Choose the folder where the image is located from the left panel
- Then double click on the image in the right panel or click it once then click OK at the bottom of the CKFinder window
- In the Image Info tab, you can add alternative text, width, height, border, margin (HSpace and VSpace), and align the image either left or right (Alignment)
- The Alternative Text option is handy if a visitor to your page can’t download images properly, so instead will display text (use keywords in alternative text for SEO)
- When choosing the width and height of the image, do not make it larger than the original size as it will look pixelated
- Leave the Lock Ratio icon closed to keep the ratio aspect so the image does not stretch

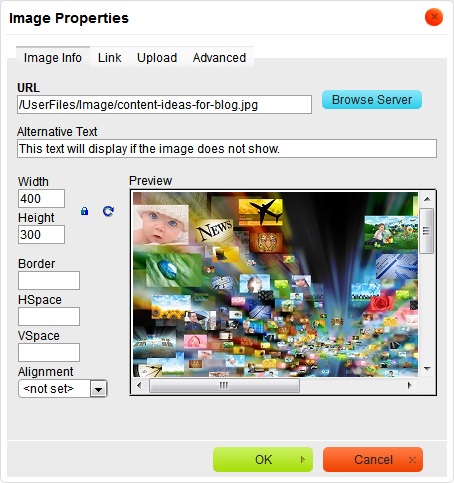
Note: first image is the height being forced by unlocking the ratio. The second image is when the ratio is locked; the height automatically sets to what it needs to be to keep the ratio aspect.
- We recommend leaving the Height blank however for responsive websites
- The Border option is measured in pixels and is a black solid line by default
- HSpace is left and right margin on the image measured in pixels
- VSpace is top and bottom margin
- Alignment floats the image either to the left of the text or to the right, or none
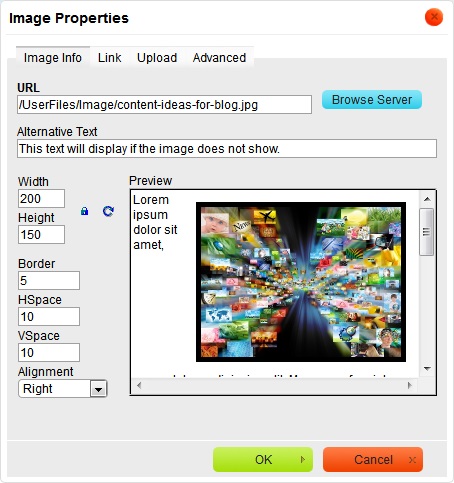
Note: notice the Preview frame, it is not perfect but it gives you a general idea of the outcome.
- Click OK when you are finished editing
Hyperlink
- Highlight the text you wish to link and click the Link icon (earth with chain link around it) located on the 2nd row

- Choose the link type from the drop down
- URL (website address, file)
- Link to anchor in the text (links to an existing anchor placed in the same page)
- E-mail (links to an email address which when clicked automatically opens a new message to be sent to that email)
URL
- If URL was chosen, type in or paste the URL in the box below (in most cases the Protocol property will be chosen automatically from the URL you have used)
Note: when linking to external websites it is a good idea to make it open in a new tab / window. To do this go to the Target tab and choose New Window (_blank) from the drop down. - If you are linking to an existing page on your site choose <other> from the Protocol drop down box and paste in the page file name (only consists of lowercase and dashes), which you can find if you go to Content Management > Pages
File
- To link a file (such as a .pdf) or an image click Browse Server and choose the file or image in the CKFinder
- If the file is not already on the server, go to the Upload tab and click Browse or Choose File
- Choose the file from your local computer and click open
- Click Send it to the Server
Note: as said above, it is also a good idea to make the link open in a new tab / window when linking files so the user is not being taken completely away from your website.
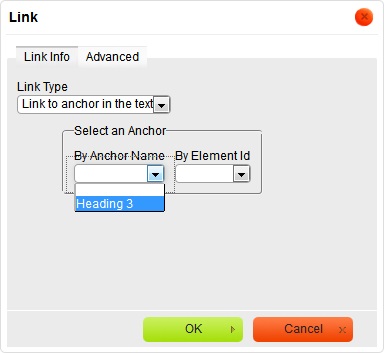
Anchor
- To link to an anchor first you will need to create an anchor
- Highlight some text that you want to be anchored, then click the Anchor icon (blue and silver flag)

- Give a name for the anchor, something easily distinguishable, and click OK
- A red flag will now show next to the anchored text
- Now go to the Link properties and choose Link to anchor in the text from the drop down
- Choose the anchor from the By Anchor Name drop down
Email Address
- To link an email select E-mail from the Link Type drop down in the Link properties window
- Type in the email address
- If you wish, type in a subject and body to be the default in the new message when the link is clicked
Image
- To link an existing image double click the image to open the Image Properties window
- Go to the Link tab
- Paste in the URL to a website or Browse Server to link to a file/image
- Select the target for the URL (New Window (_blank) will usually open in a new tab depending on the browser in use – this is recommended when linking to external websites or files)
Tables
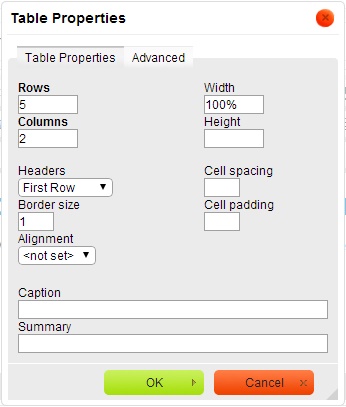
- Select the Table icon from the second row

- Fill in Rows and Columns with a number of what you want each to be
- Set the Width blank if you wish it to adjust to the content inside, else the table measures in pixels but also in percentage if you add a % after the number, e.g. 100%
- The Height does not need to be filled in as it will automatically adjust
- Headers are available for the first row, first column, or both
- The Border Size option is measured in pixels and is a black solid border by default
- Choose an option of Alignment if you wish for the table to be centred, to the left of the text, or to the right
- Add in a Caption in if you wish to have a title for the table
- Click OK when you are finished
- If you wish to change an option right click the table and click Table Properties, except it does not allow you to change the Rows and Columns options again
- To add a new row or column right click the table, hover over either Row or Column and click one of the Insert options
Note: the row or column will insert before or after where you right clicked on the table.
Embedded Code
This is useful for widgets such as a Facebook feed and videos from YouTube, Vimeo, etc.
- Click the [E] icon on the bottom row of the toolbar

- Paste your embedded code into the space and click OK
Forms
- Click the Form icon from the form section of the toolbar (first row)

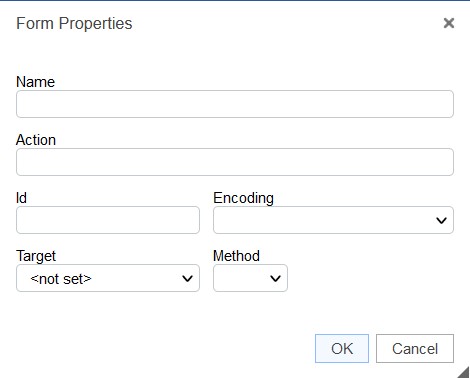
- Fill in the following properties:
- Enter a Name of the form
- Input an Action
- Select an option for Encoding
- Select a Method
- When you click OK you will see a red dotted box, place your form fields within the red dotted box by selecting them from the toolbar
Text Field
- For text fields select the Text Field icon from the toolbar (white box with letters ab in it)
- Fill in the Name and Value (if you wish for there to be text in the field)
- Choose a type from the drop down
- You can set a maximum amount of characters allowed to be typed in as well as a width which is measured in pixels
Textarea
- Textarea is the icon to the right of Text Field
- Fill in the Name option and Value (if you wish to have text already in the field)
- You can set the textarea to a certain width and height by filling in the Columns and Rows option
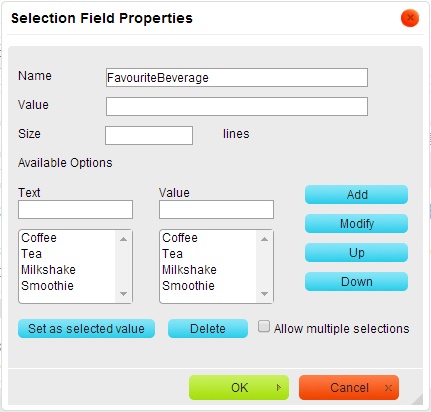
Selection Field
- To add a Selection Field click the icon to the right of the Textarea icon on the toolbar
- Type in a Name for the field
- You do not need to specify a Value or Size (number of lines)
- When adding options make the Value the same as the Name
- Once you’ve typed in both click Add to add it to the list
- You can change the order of the options by clicking one and clicking the Up or Down buttons
- When an option in the list is selected you can change the Name and Value text, if you have done so make sure you clock the Modify button before unselecting it
- You can delete an option by selecting it and clicking the Delete button
- If you wish for there to be an automatically selected option, select one from the list and click Set as selected value
- You can allow multiple selections by ticking Allow multiple selections
- Click OK when you are finished
Checklist
- When adding a checklist you will need to add one checkbox at a time
- Put your cursor in the area you want it and click the Checkbox icon on the toolbar (blue tick inside a box)
- Fill in Name and Value (use the same name for each)
- If you wish it to be selected already tick the Selected option
- Click OK and type in the name of the checkbox next to it for the users reference
- Repeat these steps to add more, either on the same line or press Enter on your keyboard to go to a new line after each one
Radio List
- Follow these same steps for the radio buttons, except use the Radio Button icon (right of the Checkbox icon)
Hidden Field
- You may also include the following Hidden Fields (last icon in the form section of the toolbar)
- Subject - the value entered here will be the subject line of your email. If not included then the Title of the page will become the subject.
- Recipients - comma separated list of email addresses. If not included then the Administrator's email address becomes the recipient.
- EmailPageName - this is the name of the page used when email the results. The results are merged to this page. If not included a page is automatically generated.
- AttachmentFormat - if value is "csv" then the results are attached to the email in a Comma Separated Values (CSV) file which you can use to import into another program.
- RedirectURL - this is the name of the page or URL to redirect to when successful. i.e. a Thank you page.
- OnSuccessMessage - if RedirectURL is not included then this is the message that is displayed when successful. If this is not included either then "Completed Successfully" is displayed.
- To add a hidden field click the icon and type in one of the bolded titles in the list above into the Name property
- Type in a Value, depending on which hidden field you have chosen, e.g. Recipients – type in one or more email addresses, including a semi-coelom after each address if multiple
Required Field
- To make fields Required you need to go to the source and add the following attribute to the input, textarea or select elements you want to force the user to enter:
<input required="true" ...
<textarea required="true" ...
<select required="true" ...
Submit Button
- To add a submit button click the blue button icon in the form section of the toolbar
- Type in a Name (e.g. Submit)
- Add in the Value for the button, what you want it to say
- Choose the Submit option from the Type dropdown
- Click OK
